Sunday, July 28, 2013

Leisure 22: Pink and Black Combo

PINK AND BLACK COMBO

Hi everyone! Today is pink and black combo day. How to do it? It's as easy as 1, 2, 3, 4 and done! Let's get started!

You will need:
Base coat
Top coat
Black Polish
2 shades of Pink Polishes
Heart nailart design
Nail Glitter
toothpick


HOW TO DO IT:

 STEP 1
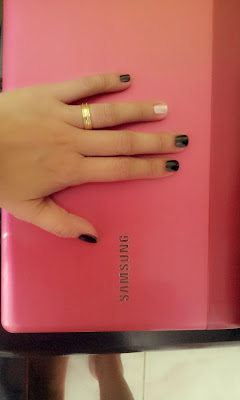
Clean your nails. Put base coat on your nails. Put black polish on four of your nails.
The nail on ring finger is pink for the pink accent.


Photo of my right hand.


 STEP 2
Using your tooth pick and the 2nd shade of pink draw three lines on each of your black nails.
While the polish is still wet, go get a heart or any design you wish to put on your nail.

Closer look of step 2.


Nail art stuff from my Aunt Helen


STEP 3
Spread some glitters on the designed area while polish is not yet dried.


Closer look of step 3.


STEP 4
Put top coat, let it dry and you are DONE!

 Do the same on  your toenails if you like.. 
Besides, they need LOVE too.


That's it for today! I hope you had fun reading my tutorial.
Have a great day!

Don't forget to follow me on instagram - slimwitch

Thursday, July 25, 2013

Leisure 21: Despicable Nails


MY DESPICABLE ME NAILS

This minion nails is very easy to do. You will need:
Yellow polish
Blue polish
base coat
black polish
white polish
top coat
dotting tool
tooth pick

HOW TO DO IT:
 Step 1
Put base coat on your nails to protect it from being brittle.
Put yellow polish and allow it to dry.


Step 2
Put blue polish as a french tip or tip of your nails.
NOTE: In this part, you will see that instead of BLUE, the result when blue is applied is GREEN.
REASON: Primary colors when combine make secondary colors. In this case, YELLOW + BLUE = GREEN. So, I suggest for you to really let it dry and then use a different and stronger blue color.


Step 3
Using your dotting tool and white polish, put some dots on the yellow part. This will serve as the eyes of your minions. 


Step 4
And using the tooth pick and black polish put a small dot inside the white circle for the eyes of your minions plus the lines that will serve as their goggles.

Remove excessive polish around your nails and put your top coat.

That's it, you are DONE!


Photo credits to my baby Anica Marish Seno.


Have fun girls, ladies and mommies!!!

Don't forget to follow me on instagram -slimwitch

Sunday, July 14, 2013

Leisure 20: Anchor It!

Today, I have decided to clean my nails and redesign. 14th of July is my sister's birthday. So, I used my sister's favorite color for my nails -- red! And the ANCHOR design is one way of showing that I badly needed to go to the beach to relax.


NOTE: This design is not originally mine. I was inspired by my friend Zinnia Villarin also known as Coach Z. She sent me a video showing how this was done, only I made it different from the original.

You will need:
base coat
top coat
red polish
blue polish
dotting tool
white polish

How to do it!? It's always as easy as 1, 2, 3 , 4 and you are DONE! Let's get it started.


 Step 1
Put base coat on your nails to protect them from cracking and being yellowish.
Using red polish, color all the nails except the nail on your ring finger.
This time for your nail on the ring finger, you will use white polish. This will serve as your accent.


A better view.


 Step 2
Using the dotting tool and blue polish, put a dot on the white nail.
That dot will serve as the top point of your anchor design.


 Step 3
Draw a line going down.
And draw the rest of the anchor.


Step 4
When you are done with the design, use a white polish and small dot of your dotting tool.
Put a small dot on top of the blue top point of the anchor.
Remove excess polish and apply your top coat.

You are done!!!

----

Do the same on your toenails. 
Make your feet happy too!

Don't forget to follow me on instagram - slimwitch


Have a lovely day everyone!

Saturday, July 13, 2013

Leisure 19: Candy Crush Inspired Nails

After a week long of stress and devastation, my friends in school and I decided to watch a movie. We had PACIFIC RIM for snack and then we had NAIL ART session!!!

Nail Model : my friend and classmate Roevi Patrice Mendoza


Left nails -- model: Roevi Patrice Mendoza
Right nails -- model: Fremie Riza Gamolo
Nail Artist: Jonee Slimwitch (that's me)


Let's start doing simple, fun and amazing nail art designs! It's as easy as 1, 2, 3, 4 DONE!

1. CANDY CRUSH DESIGN

You will need:
base coat
top coat
white coat
pink polish / blue polish / brown polish (these are for the candies)
dotting tool 
toothpick

HOW TO DO IT:
Step 1
Put your base coat to protect your nails from craking.
Using the white polish, color all the four nails except the nail on your ring finger. Use the brown polish for that.


 Step 2
Allow white polish to dry. Put blue polish on top of it only half way. This will serve as your blue candy.
Allow it to dry.


Continuation of Step 2
Using a tooth pick, put some blue lines at the top. Using a tooth pick again, put a white polish in between the solid blue color and the blue stripes.
NOTE: Do the same with the red color for your red candies.


 Step 3
On the nail of your ring finger, the color is different because this is the bomb.
Using a dotting tool, put some small white dots on top of the brown polish.


Continuation of Step 3
After allowing the white dots to dry, using dotting tool, put some colors on top of the white dots like pink, blue or red.
This will give a popping look with the dots.


Step 4
Put your top coat. Remove the excess polish around your nails and you are DONE!

NOTE: Inspired by one of those amazing nailartists I really adore -- http://www.youtube.com/watch?v=sHS-MubQJDE&feature=em-subs_digest


2. BLACK DOTTED NAILS

You will need:
base coat
top coat
pink polish
blue polish
black polish
dotting tool
tooth pick

HOW TO DO IT:

 Step 1
Put your base coat to protect your natural nails. If you don't have one, using the pink polish apply it directly on your nails.


 Step 2
Using your dotting tool, dot blue color on your nails. However, just put dots on the left or right going down just like the design on this photo.
But if you have better designs in mind, that would be fab!


 Step 3
Using your toothpick and black polish, draw a small check from the blue dots.


Step 4
Put your top coat. Remove excess polish around the nails. 
DONE!

Have fun ladies and mommies!

Don't forget to follow me on instagram: slimwitch

with my nail models
left to right:
roevi, slimwitch and fremie

Wednesday, July 10, 2013

Leisure 18: Relieve Stress (DIY nailart)

It's been a long time since I last posted on my blog. School time's hectic. I was inspired by my friend Chariz Carbon that's why I figured it's about time to put something on my blog again.


This is one way to relieve my self from stress.

YOU WILL NEED:
top coat
pink polish
silver or gold polish
black polish
base coat
dotting tool
tape

HOW TO DO IT:

It's always as easy as 1, 2, 3, 4!


 Step 1:
Apply top coat. Let it dry. Apply Pink polish. Let it dry.


 Step 2:
Using your tape, form a triangular shape on a part of your nail where you would like to apply the polish.
Apply either silver or gold polish, whichever suits you best.
Let it dry and carefully remove the tape.


 So, this is how it looks like when you are doing it with the rest of your nails.


 This is how it looks like when you are done with silver or gold triangular shape on your nails.


 Step 3:
Using the tape again, try making another triangular space on the other end of the nail.
Apply blue polish or any color you would like to put.
Let it dry.


Step 4:
Using your dotting tool and black polish, draw dots in the middle of silver / gold triangle and blue triangle.
This way the gap in between these triangles will be covered.
Apply top coat. Let it dry and remove excess polish around the nails.

DONE!!!


That's it for today!

Have fun!!!